When adding and updating content in a multilingual project, the automation of translations is beneficial. This allows the translation to be completed quickly without requiring excessive work from the client, and it also helps to maximize the efficiency of human resources by allowing them to focus on more important aspects of the project.
After all, investing in localization also means keeping your product or service up to date for every market you choose to cater to. In this tutorial, we'll see how Localazy can simplify this process - so you can start automating immediately and enjoy the benefits of true continuous localization.
🚀 What is Localazy? 🔗
Localazy is a web-based translation management system (TMS) that aims to make software localization and translation more efficient and hopefully enjoyable for all product teams while providing a clean interface for translators and managers. This allows them to stay in control of the localization process. Localazy is a highly automated platform that can help everyone save time by reducing repetitive tasks and excessive file handling.
🏃♀️ Getting started with translation automation 🔗
Upload your files 🔗
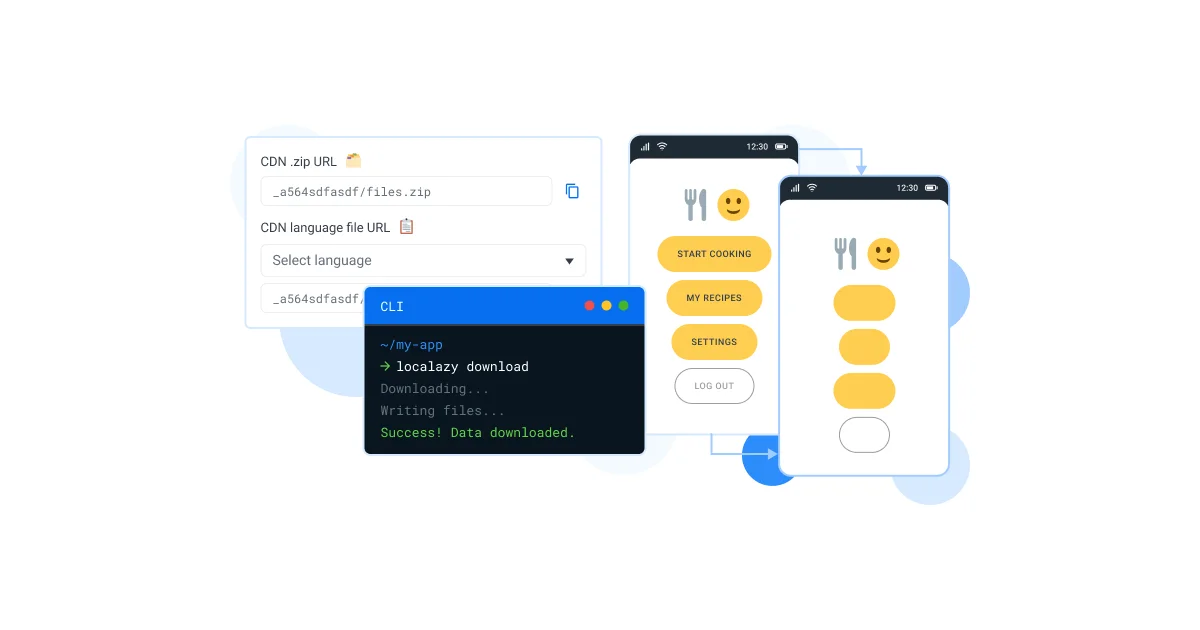
As with any other translation platform, your texts can be manually uploaded to the Localazy web interface, and you can download translated files back and put them where you need them. 📲 However, more tech-savvy users and developers should opt for Localazy CLI, which offers the highest level of automation options, or the Localazy API, which allows users to manipulate almost all aspects of their translation projects within Localazy programmatically.
In this article, we will use the Localazy CLI, which is the best option for developers to automate their content and translation workflow. Localazy CLI is the command-line interface for Localazy projects. This CLI allows you to upload and update content on the Localazy platform.
The first step is to install the Localazy CLI on your device. Installation instructions are included in the official documentation for all major operating systems.
Here, we will install it in a macOS environment. The Localazy CLI is available through Brew. Navigate to the terminal and execute the following commands:
brew tap localazy/tools

brew install localazy
We would need to create a new Localazy project. To access your personal dashboard, register or log in to the Localazy platform. Here, we would create a new project called AutomateContent. Before we upload our content, we can set up our first automation that will save us valuable time.
➡️ How to translate content automatically? 🔗
Before creating a new workflow, decide which translation approach you prefer. Localazy offers multiple options to choose from and blend:
- 💪🏻 Translate on your own or invite contributors - You can start translating on your own and use our built-in suggestion system or invite your team of translators to work on your project within Localazy.
- 🚩 Fully automate professional translations with the Continuous Localization services - Once your Localazy integration is set up, you can order translations from our vetted translators and automatically get your project translated by professionals. The service is also proactive, so you don't have to micromanage translators, and you can visit Localazy only once in a while to check the progress.
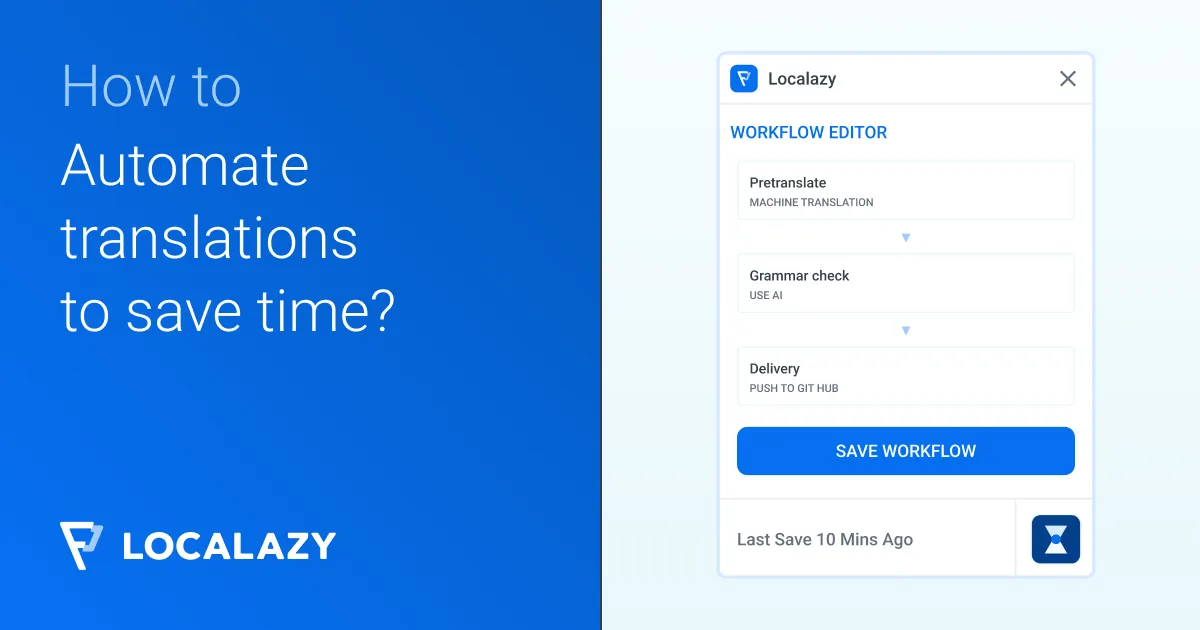
- 🦾 Pre-translate everything in bulk via machine translation - With the Localazy Autopilot plan and even Professional plan, you can instantly translate all strings by running a machine translation over the content. This is great for your software or website's first iteration of localization testing. All the Autopilot plan users can even set up an automation that will do this for you immediately after each upload. Because we want to save time, our content will constantly change, and quality is not a concern for our first iteration, let's set it up this way!
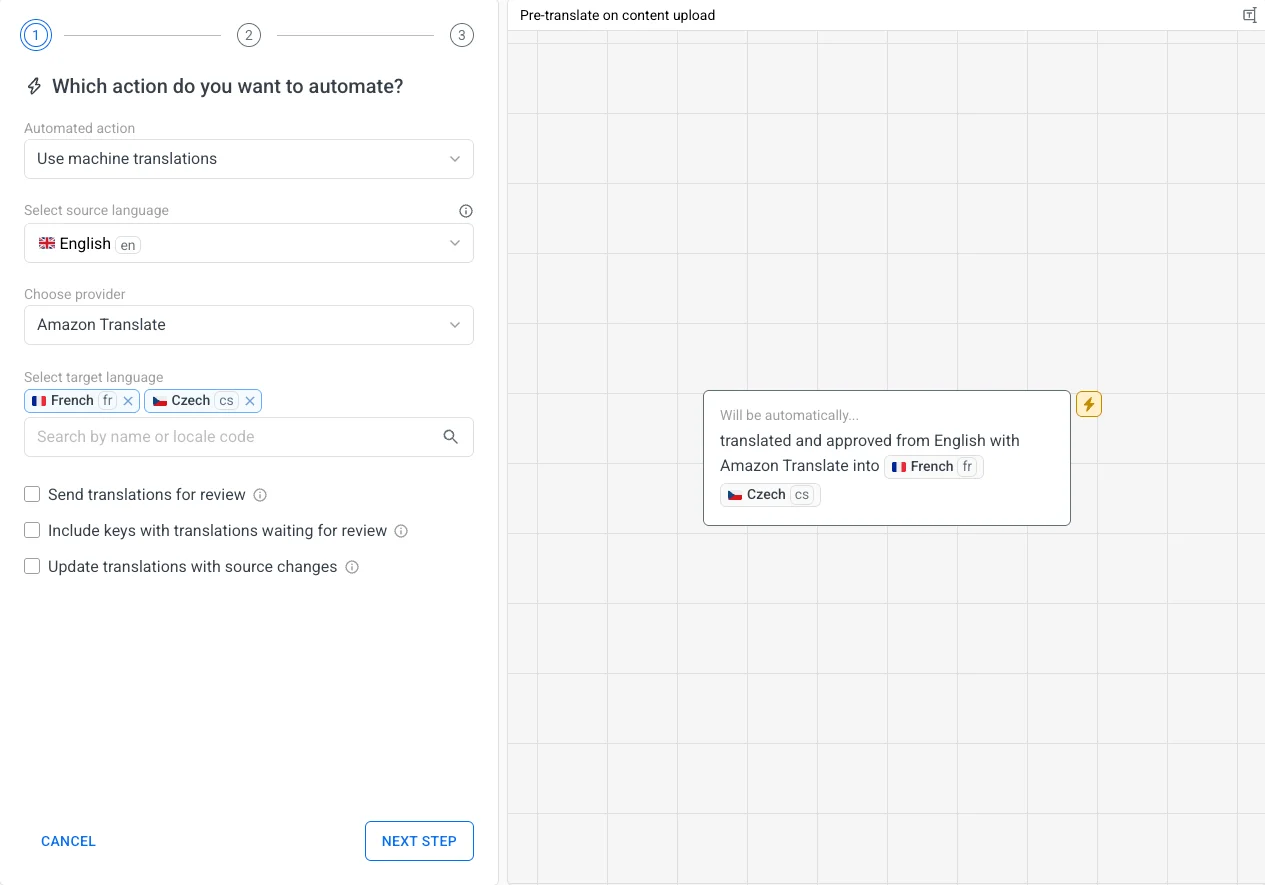
Let's set up a new automation that automatically translates all newly uploaded content into two target languages. To begin, go to your project and open Tools > Automations from the left-hand menu.
- Select your action and source language
Choose the automated action (e.g., Use machine translations), set your source language (e.g., English), and select your translation provider (e.g., Amazon Translate).
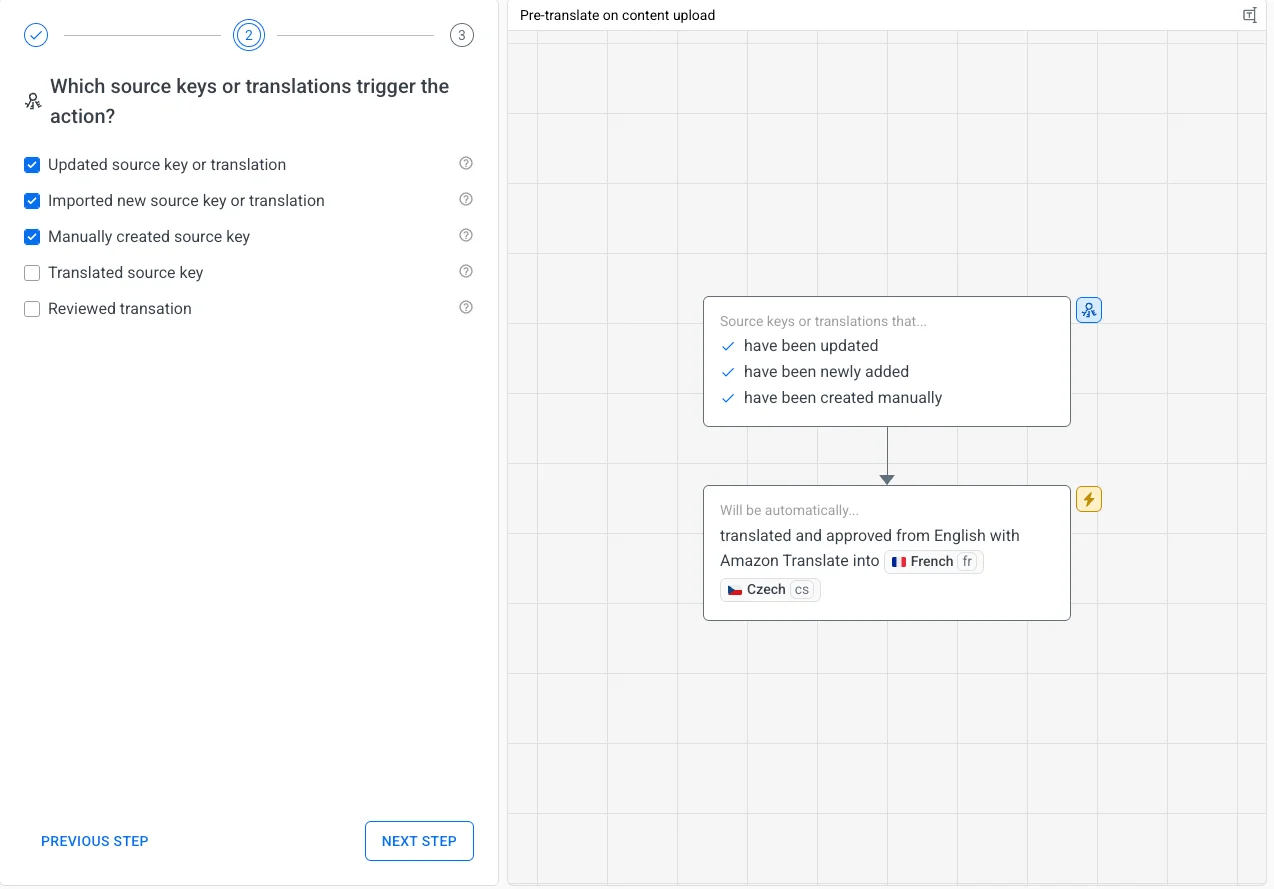
- Define when the automation should run
Set the trigger conditions, such as:
- Updated source key or translation
- Imported new source key or translation
- Manually created source key
- (Optional) Apply filters
If needed, use filters to limit which events trigger the automation (e.g., filter by user).
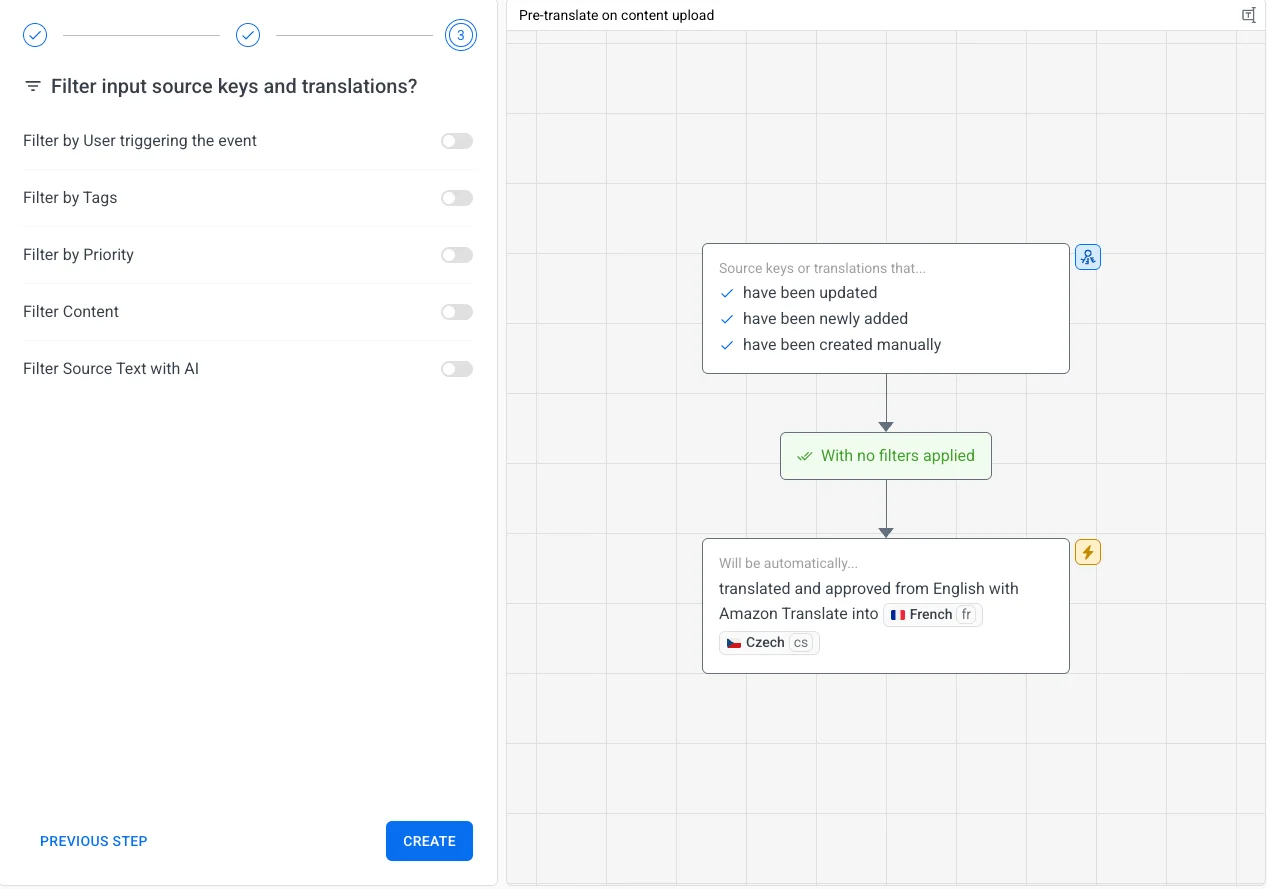
🪄 Filters give your automations more control and precision. Learn how to set them up here.
- Enable the automation
Review your settings and toggle the automation ON to activate it.

📄 Learn more about Automations in the docs.
Add content to your project 🔗
Now we can upload our content to Localazy. But first, we need to create some.
We would create a new node project called AutomateContent. The project can be initialized using the npm command.
Next, create a configuration script called localazy.json. This file contains commands instructing the CLI on how to handle content uploads to the Localazy platform.
Here’s an example setup for uploading a JSON file:
{
  "upload": {
    "files": [
      {
        "type": "json",
        "file": "public/locales/test_en.json"
      }
    ]
  }
}
Run the CLI upload command:
localazy upload
This will upload the source content and trigger the automation to apply machine translation (in our case, for French and Czech).
Review and improve the translations 🔗
Localazy’s review workflow enables you to accept or reject translations through a dedicated interface. Typically, only approved translations are available for download. That said, the platform can be configured to make unapproved translations downloadable for selected languages.
You can also skip the review process entirely by editing the automation and unchecking “Send translations to the review process.”
To later mark machine-translated strings as needing improvement, create a new automation using the “Set as needs improvement” action and apply a filter for LocalazyMT as the translation author.
🤔 Updating translated content, what now? 🔗
When you need to update your content to change or improve the messaging, you will inevitably have to translate it again. With Localazy, the whole process is a breeze with automation.
We added a new field to the source file and uploaded the source language. The automation resumes, and translations to French and Czech are completed automatically.


✂️ Improving the translations later 🔗
If you decide to skip the review but still would like to go over the translations later to check the quality of MT results, you can set up another automation.
Select the action "Set as needs improvement." You can use Filters only to include the LocalazyMT user, so all machine translations will be set as needing improvement, but translations from humans will follow the usual workflow. This approach can also be combined with professional translation services provided by our Continuous Localization Team.
🤖 Automating human translators 🔗
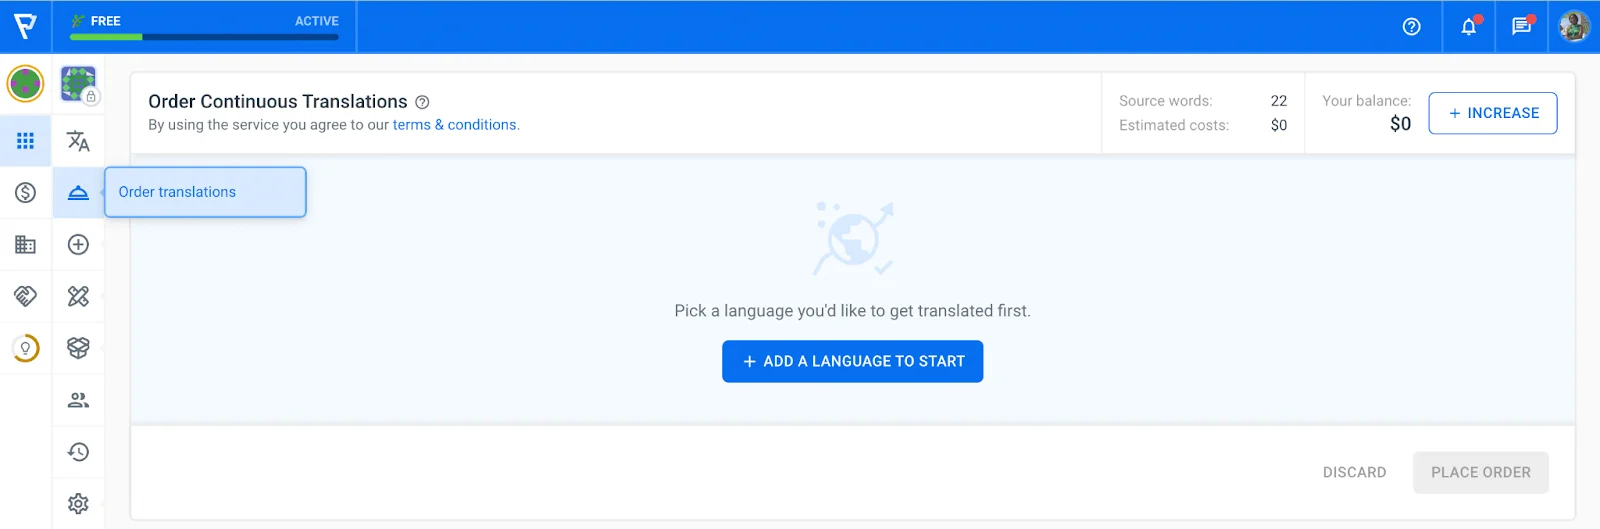
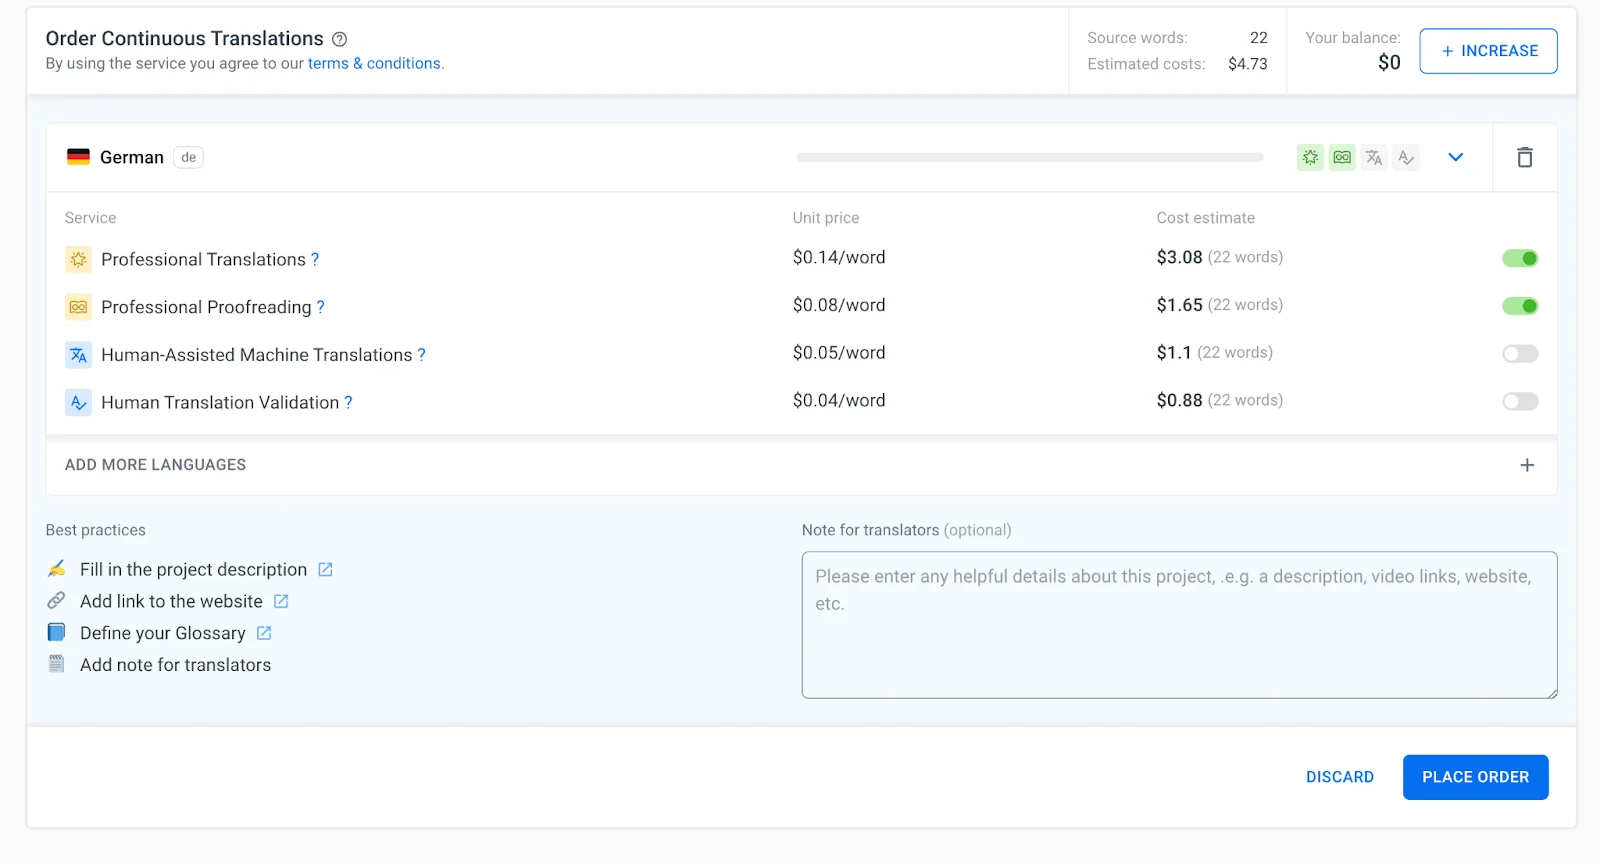
You might be interested in adding professional translators to your project. They can handle translation services and offer human-assisted localization within the application. To make an order, simply click on Order Translations in your project dashboard.
The next step is to add the language you want the source language translated to. There are four available services to select from:
- Professional Translations
- Professional Proofreading
- Human-Assisted Machine Translations
- Human Translation Validation
You can check the differences between each type of service in our ultimate translation guide. For now, we will be selecting Professional Translations and Professional Proofreading.

After adding the languages, you will be prompted to place an order, at which point you will be required to purchase credits (read the full docs about credits here). In the details, you can see an estimate of how many credits it will take to complete each service, with the total estimate displayed in the top section, along with your current balance and an INCREASE button to purchase credits.
After purchasing the credits and verifying everything is in order, you will see a green dot next to the app icon. The translation service will start working in the background, scanning your project and delivering new translations as soon as possible. Now, you and your team can focus on other important tasks while localization is up and running. 💪
✔️ Conclusion 🔗
Localization is not just about translating languages but also about improving the quality of the products and services that are being translated. And that takes time and effort. With Localazy's automation features, you'll be able to make this process a lot easier.
Are you ready to set up your first Automation? Or would you rather automate human professional translations? Sign up, choose your approach, and never worry about translations again!